|
[2025-01-11] It’s been about a 14 month span between finishing the Invaders game and now finishing Alien Sidestep Pinball. The Invaders had been such a large project, I spent several months on smaller projects (page22). All the while, though, I was thinking about the next big project, which recently means another game. When I start by coming up with a theme, it gives me the enthusiasm to commit to the project, which is a mental hurdle due to how much time and effort they take.
Concept
This time, rather than use another sci-fi TV show, I decided to use my own theme! Back in 1983, I had a home video game cartridge “Alien Sidestep” on the market. For that story see the second article on this page: Electronics_Products_Misc_page_1
My original Alien Sidestep has aliens coming down to earth in several rows. You shoot at them like crazy to keep them from landing. When 4 make it down, the game is over. I began to think about how I could bring the 2D video game into the 3D solid object pinball world. It would be kind of a homage or sequel to my original game.
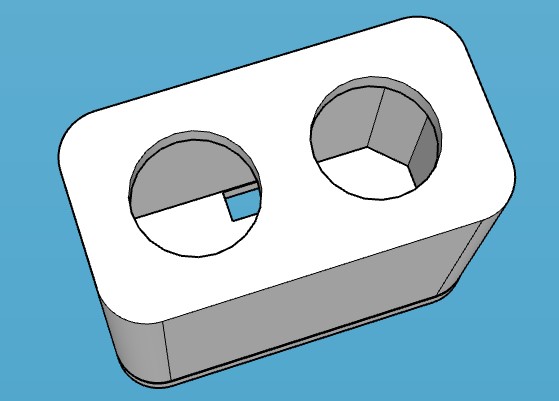
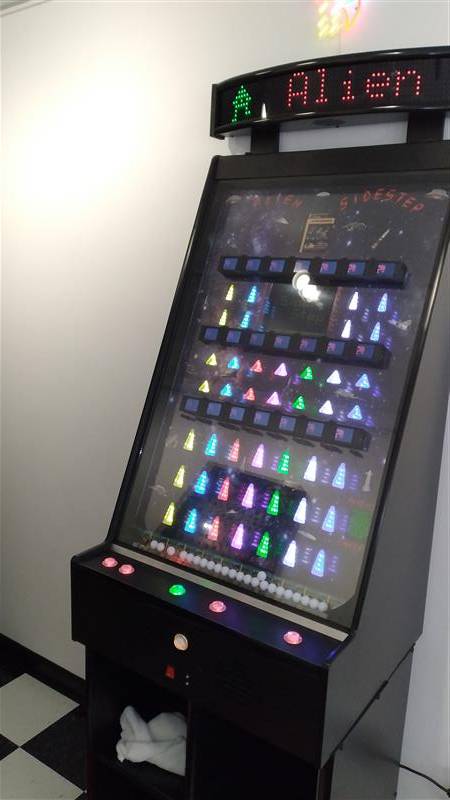
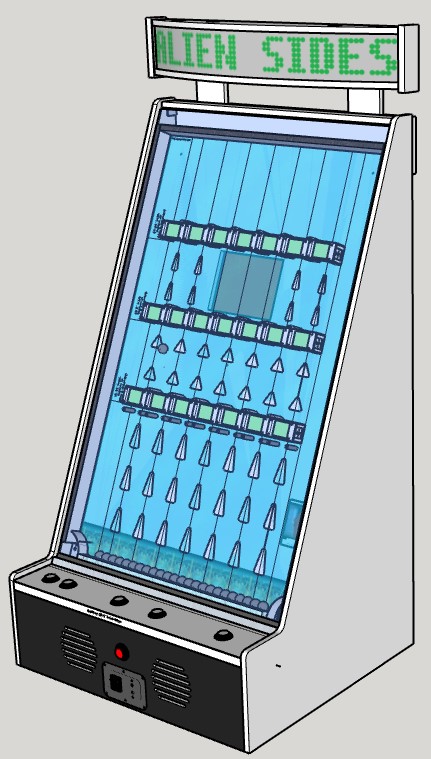
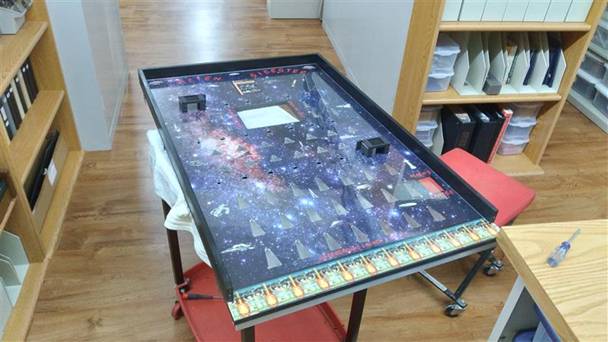
The idea took shape to have rows of “Targets”. A Target would be a small LCD display raised above the playfield by pillars on both sides. Aliens would march across the targets left to right, row to row as in the video game. The player would shoot a ball under the LCD, between the pillars. If an alien was on that screen at the time, it would be a kill!
With my vertical pinball games, gravity is always the big limiting factor. Launching a heavy pinball straight up is pretty much out of the question. While I did use slightly smaller than standard solid chrome pinballs in my Outer Limits game, that was facilitated by having multiple ramps. Then on the Invaders game, dropping solid chrome balls from the top, especially long uninterrupted drops, would have created all kinds of damage. That was when I realized I could use solid plastic balls. So, with that experience, that’s what I decided would make launching balls up at targets possible.
Design Begins
The Target’s support pillars need to contain it’s LCD harness on one side and house IR ball detection on the other. This meant that rather than have an IR beam be interrupted as in all 3 previous games, I would have to put the emitter and detector on the same side and rely on reflection. While a chrome ball would be ideal, it turned out that the bright white plastic balls I used work fine. Early on, I did experiments by mocking up a Target with the IR elements. I found about 2.4msec of detection, though that was with me simulating a launched ball by flicking it. I never measured the final game, but since I am using interrupts any short detection pulse will work.
Since the theme is my 1983 game cartridge, I decided to squeeze an 8” LCD monitor onto the playfield between the top and second rows of Targets. I had an old VIC20 that my friend Gregg had given me many years ago. I took out the board, cleaned it up and got it going. I removed it’s power supply section and anything else not needed, and mounted it on an inside vertical wall. Video goes to the monitor and audio to a little audio amp board I designed for a previous game. I put a small speaker in the Marquee chassis aimed down and dedicated that to the VIC20.
Now I have both the new pinball game which I call Alien Sidestep 3D, and the original video game which I call Alien Sidestep 2D together in the same game. The player arcade buttons include one labeled “3D” and one labeled “2D”. Push either one to select which you want to play before pushing the Start button. At your left hand are the Left < and Right > arrow buttons to move the launcher. On the right is the Fire button. You use these for both types of game play.
Since the Outer Limits game was done in black & white, I made the Invaders game as colorful as possible. Since the background for Alien Sidestep would be a space scene, I wanted the rest to be colorful. Not only that, but I always like to add as many cues to actual pinball machines as I can. I ordered some playfield insert samples to play with. These are the backlit shapes you see embedded into the playfield on pinball machines. They are sometimes white, colored or clear, and might be round, square or various shapes of arrow. I ended up using 3 different arrow or triangle shapes to create 7 columns aiming upwards, pointing to the center of the Target’s openings. I used clear so that I could use WS2812B smart LEDs behind each one. This way I can control the color of each playfield insert. I used the same µC based LED Controller board I designed for the Invaders game to control them. It receives commands from the master Game Controller µC to go into different display modes.
Underground Launch Facility
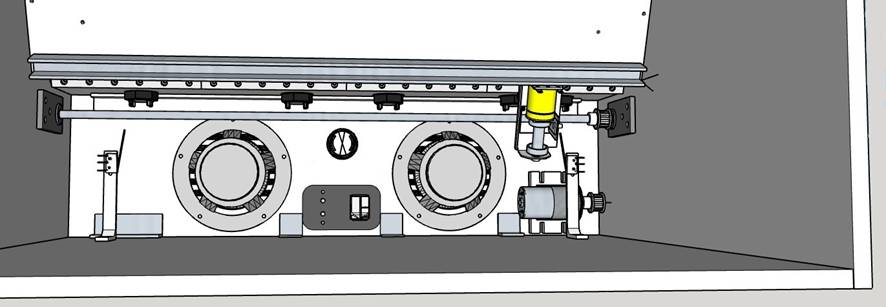
The most important mechanism is the “Underground Launch Facility” at the bottom of the playfield. Here I have a square acrylic rod mounted just forward of the playfield. This creates a gap where all the “Plasma Balls” are lined up. Underneath that, inside the game, I mounted a pinball solenoid ball launcher to a “carriage” mated to a “linear guide rail” oriented left to right. In addition, a “lead screw” goes through a flange nut which is mounted on the solenoid ball launcher frame. At one end of the lead screw is a toothed pulley. A toothed belt connects that pulley with another toothed pulley mounted to a DC gear motor. This allows the launcher to move left and right controlled by the player’s direction buttons during 3D game play.
The importance of the square acrylic rod where the balls sit is that the launcher has 2 smart LEDs, one mounted on each side of the solenoid’s “plunger”. The LEDs create 2 bright dots on the upper frontal edge of the square acrylic rod. The player uses these as a “site” to line up the launcher under a ball. When the player fires, the plunger actuates and it’s tip goes through the gap the balls rest in and hits the desired ball if lined up properly.
3D Game Play
The launched ball, whether it makes it through targets or not, eventually falls back down to the lineup with the rest of the balls. Sometimes they get bunched up, but that’s part of the game play to go to the pile-up and blast it apart.
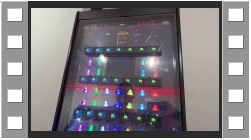
When the player gets a ball through a Target when an alien is substantially on the screen, it’s a kill! The screen flashes that style alien in black & white, a loud sci-fi disintegration sound is played and all the playfield’s inserts go red. After a short time the points replace the alien on the Target’s screen and those points are added to the score on the big Marquee color dot matrix display.
When an alien makes it to the bottom right, past your defenses, that alien (in that style and color) is added to the “Alien’s Landed” medium size portrait mode LCD in the lower right of the playfield. When 6 have landed it’s Game Over! A robot sounding voice says “Game Over”, the playfield inserts flash purple and the Marquee flashes “Game Over”. Then the game returns to Attract Mode.
Like it’s 2D ancestor, when you’ve killed off an invasion by each of the 3 types of aliens, the points double. This is announced by a sinister alien voice and displayed on the Marquee.
I have up and down volume buttons on the front of the machine for the background music. Since the theme was not a TV show, I used 4 spacey music files for background music. Also, I found online a really compelling short music piece that plays once whenever you enter Attract Mode. For an additional tie to the original game, I recorded and used the same audio effect for when an alien gets by you and lands.
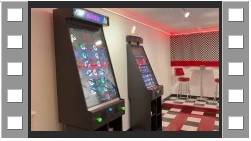
A New Home For My Games
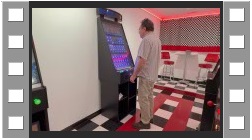
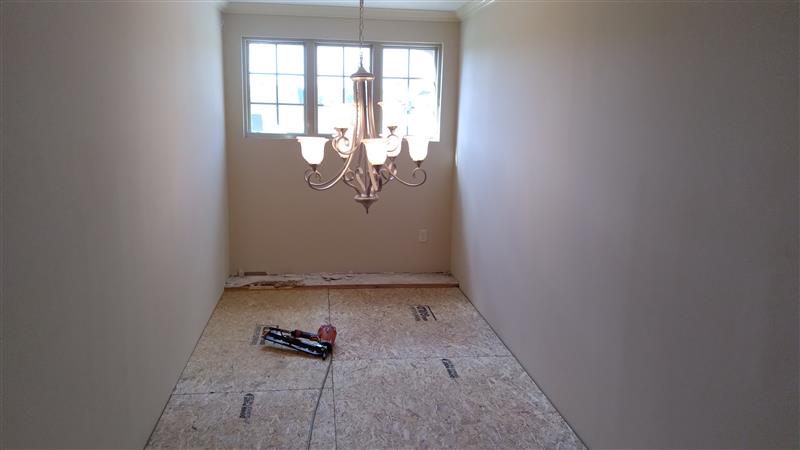
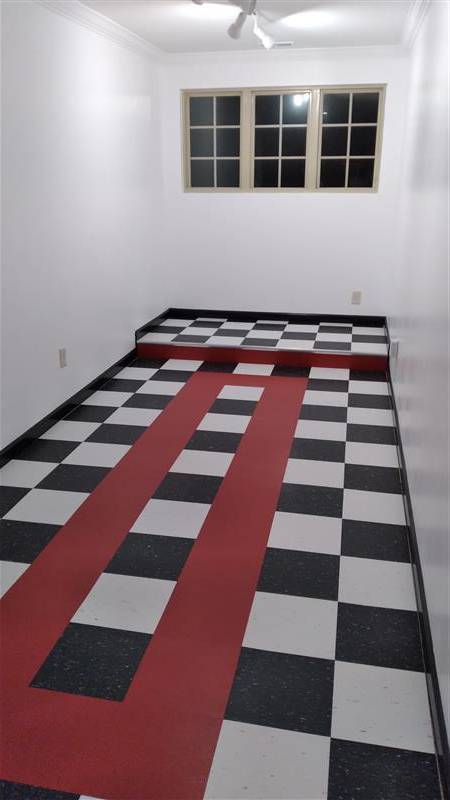
When it looked like I was moving along in making this game, it became clear that our “Diner” where my first 3 games sit was running out of room and losing it’s original purpose. Our house’s entryway is two story with a big chandelier hanging in it. Some people bought the option of using that space for a second story bedroom extension or other use. We had long thought it would be great to have a floor put in and make it a game room.
So now that we really did need it, we got an estimate, had the floor put in and had them do changes to the wiring. We took over from there and put down self-leveling cement (which turned into a huge task). Then we laid our traditional checkerboard with red accent floor using Armstrong VCT tiles. It’s the perfect space and we now have all 4 of the games in there along with a new square stainless diner table for which I made a new PVC pole to make it a hi-rise, then Linda painted it to look like metal. We ordered diner-type hi-rise chairs to go with it. See video.
|
|
Electronics & Maker Projects (page 23) |
|
(Electronics/PCB Design, Software, CNC, Woodworking, 3DP, DC Motor, Sound Editing, Artwork) |
|
RC Car Wheel Chocks
|
|
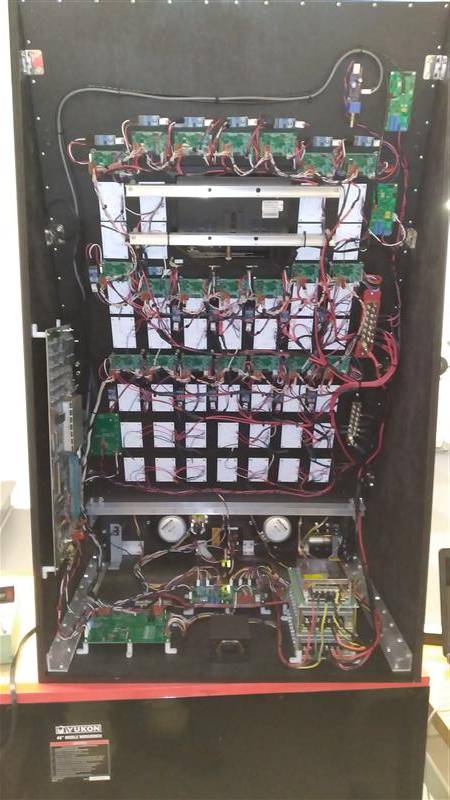
Launcher Mechanism |
|
VIC20 PCB |
|
Power Supply Stack |
|
Marquee LED Contoller |
|
Playfield Inserts LED Contoller |
|
Game Controller Bd |
|
Player Interface Bd |
|
Finishing up all the wiring harnesses. |
|
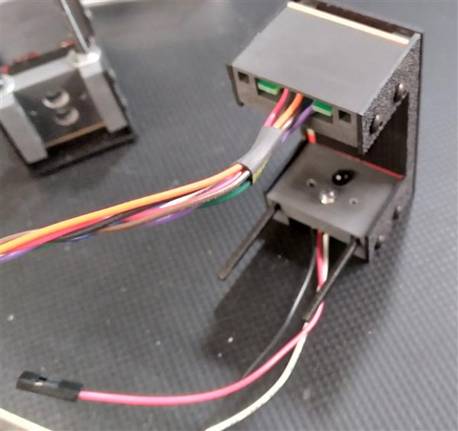
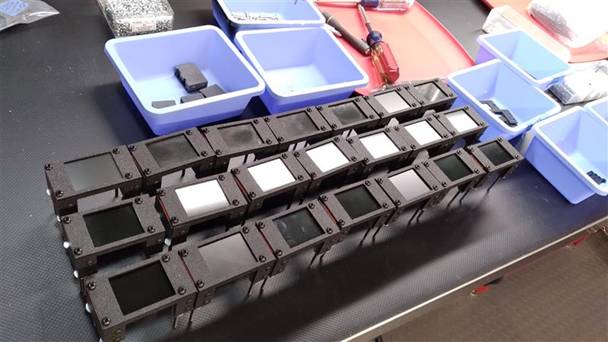
This is one of 21 “Targets” being built. I designed a little PCB that has a female right angle connector which pushes onto the LCD’s interface connector on it’s back. You can just see it in the top “pillar” where an 8-wire harness, which is directly soldered to the little board, exits.
On the other side, you can see in the interior space the dark IR phototransistor and just below that the clear IR LED emitter. They are on their own little board, and it’s 3 wire harness can be seen exiting.
These harnesses go through the playfield’s clear polycarbonate, then the poster then the playfield board itself to reach the interior of the game where they interface to the Target’s LCD controller and a small IR detection PCB. |
|
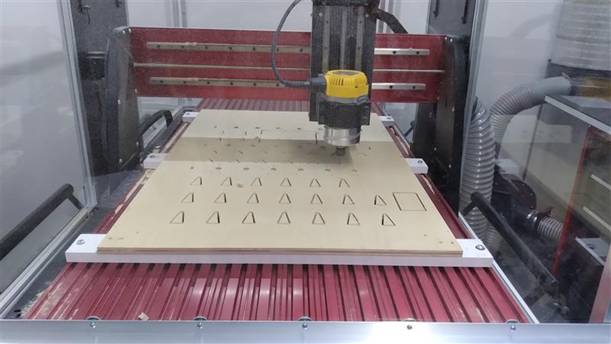
CNCing Playfield |
|
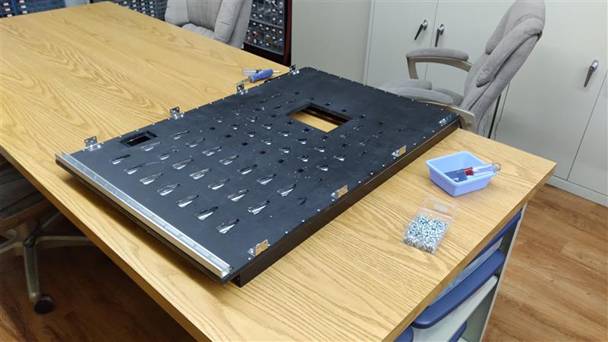
Playfield board after paint. |
|
Here after gluing on the artwork, doing all the cutouts, laying down the polycarbonate & mating the glass support surround. |
|
Building up all 21 Targets. |
|
Alien Sidestep Pinball Game |
|
(3DP, last one on Wanhao printer) |
|
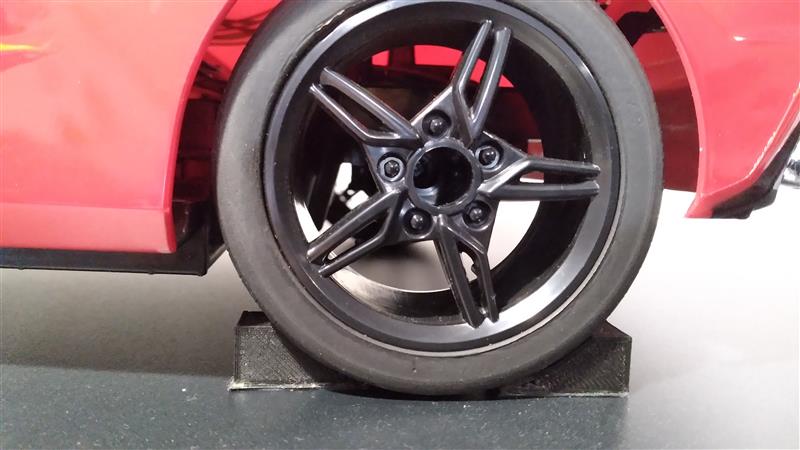
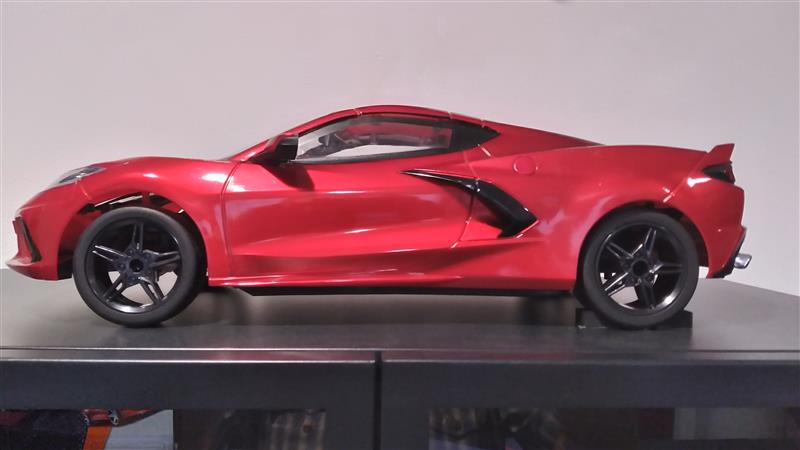
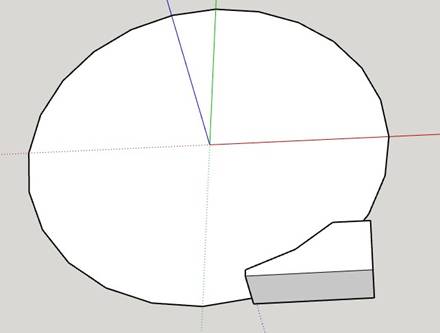
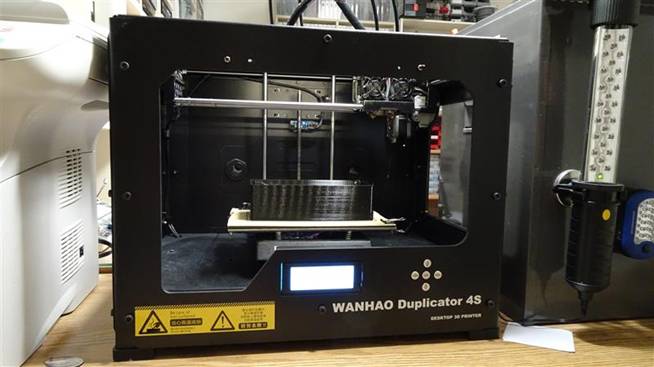
[2025-01-18] This is a tiny project were I made wheel chocks for my C8 model RC car. It sits on top of a metal curio cabinet and might roll off the top if the cabinet is bumped into. I started the design by drawing a circle the size of the rear wheel, then using that arc to make the chocks.
The real significance to this project is that it’s the last thing I made on my Wanhao 3D printer before it gave up the ghost. It was sad, but then I looked it up and found I’ve had the printer since 2015-02-17, so almost exactly 10 years. You really can’t ask for much more than that.
|
|
DC Load Banana Jacks Adapter |
|
(3DP, first one on Bambu printer) |
|
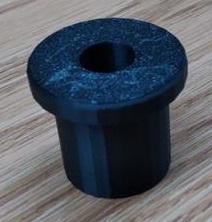
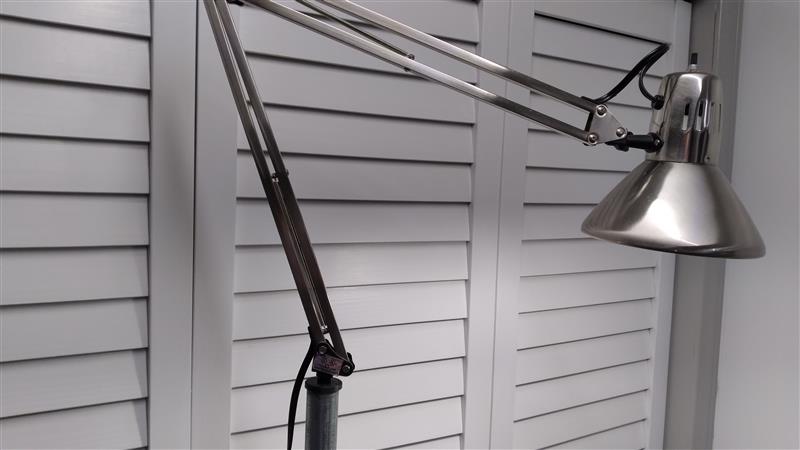
[2025-02-21] I’ve had this swing arm desk lamp for years but now had no real place for it. I had previously mounted a fluorescent work-light to the top of a piece of conduit and used an old roller stand’s tripod for portable overhead light. The little fluorescent tubes were weak, and it didn’t give off much light. So, I 3D printed a little flange that would go down into the tube, have a lip that stops it at the top, and a hole where the bottom of the swing arm lamp could mate with it. This turned out to be a versatile light.
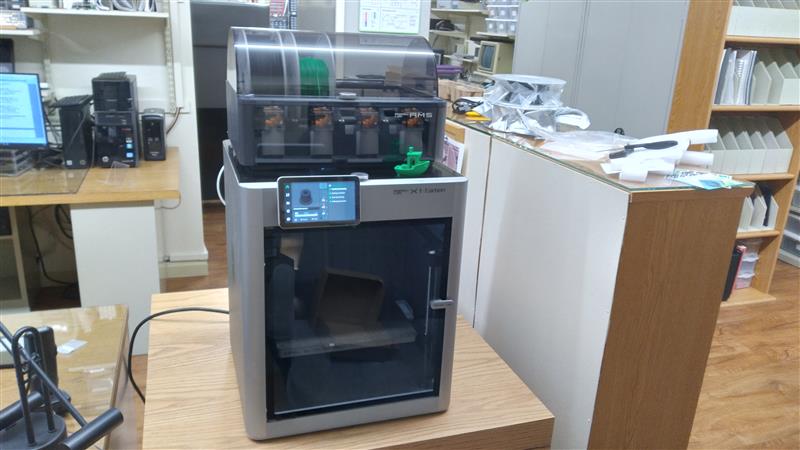
Also of note is that this is the first thing I’ve made with my new Bambu X1C 3D printer, which I set up around 2025-02-21. It’s really amazing and it’s self-leveling has taken a lot of the work out of setting up to print.
|
|
Worklamp Flange |
|
(3DP) |
|
[2025-04-16] I’ve never had an electronic DC Load before. When one went on sale, I decided to splurge. When testing a power supply or regulator, I’ve always had to dig out a bunch of old ceramic power resistors and jumper something together. Now I can load down a supply and read all the parameters. When it arrived, though, I found out that the only connectors it has are giant terminal posts meant for huge spade lugs. This is great for very high currents, but generally I only need to work with 5A or less. I just assumed I’d be using banana to alligator-clip leads.
That’s when I decided to make my own adapter. I used a large gauge wire pair and put huge spade lugs on one end. Then I designed and 3D printed a little housing, with one side having holes perfectly spaced for a pair of binding posts which of course incorporate banana jacks.
|